Installing LED lights on a wood slat wall is a fantastic way to enhance your space’s ambiance, adding a modern and stylish touch. Whether you prefer a cozy warm glow or vibrant, colorful lights, this DIY-friendly project can be tailored to suit your needs. Here’s a simple, step-by-step guide to get you started!
What You’ll Need
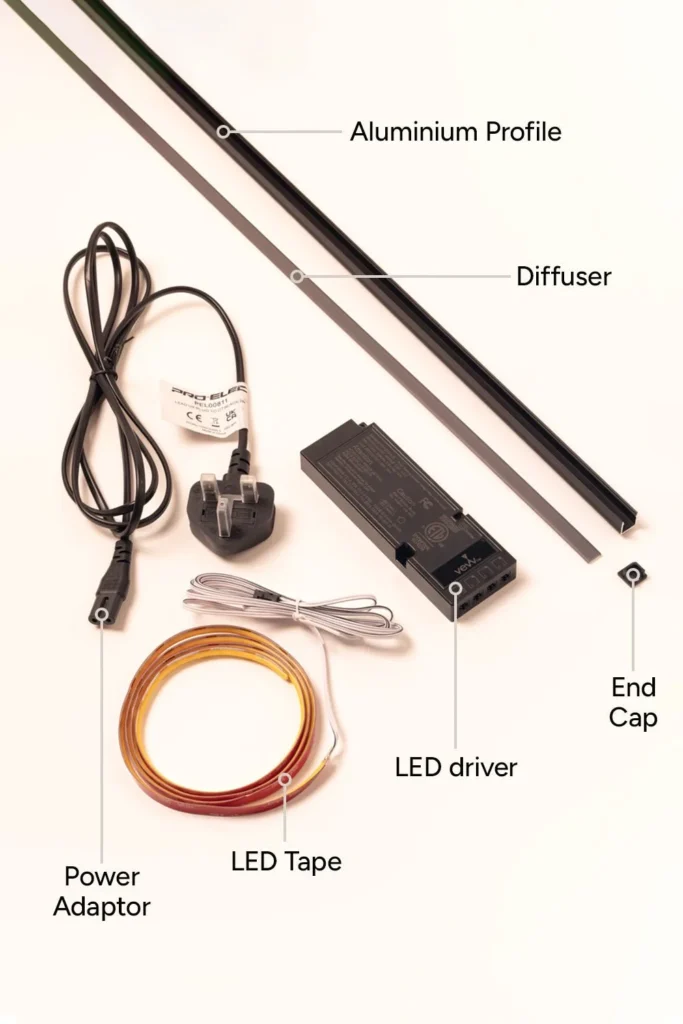
If you’re new to home design, pre-assembled LED light kits are available and ready to attach to your wood slat wall. For the hands-on DIY enthusiasts, gather the following materials:
- LED light strips/LED tape (choose the right color and length to match your design)
- LED Mounting Profiles/aluminium profile (for a sleek, professional finish)
- Power supply/LED driver for the LED lights
- Connectors (if your setup involves multiple strips)
- Double-sided adhesive tape
- Screws and brackets (optional, for extra stability)
- Drill (if using screws)
- A nearby power outlet
Plan Your LED Light Layout
- Decide exactly where you want to install the LED strips on your wood slat wall.
- Measure the desired installation area to determine how much LED strip you need.
Prepare Your Wood Slat Wall
- Make sure the surface of the wood slat wall is clean and completely dry. This helps the adhesive tape stick properly.
Cut and Assemble the LED Strip and Profile
- Cut the LED strips and mounting profiles to the desired length. The profile should be about 2 cm shorter than the LED strip to leave room for the end cap.
- Attach the LED strip to the profile as instructed by the manufacturer.
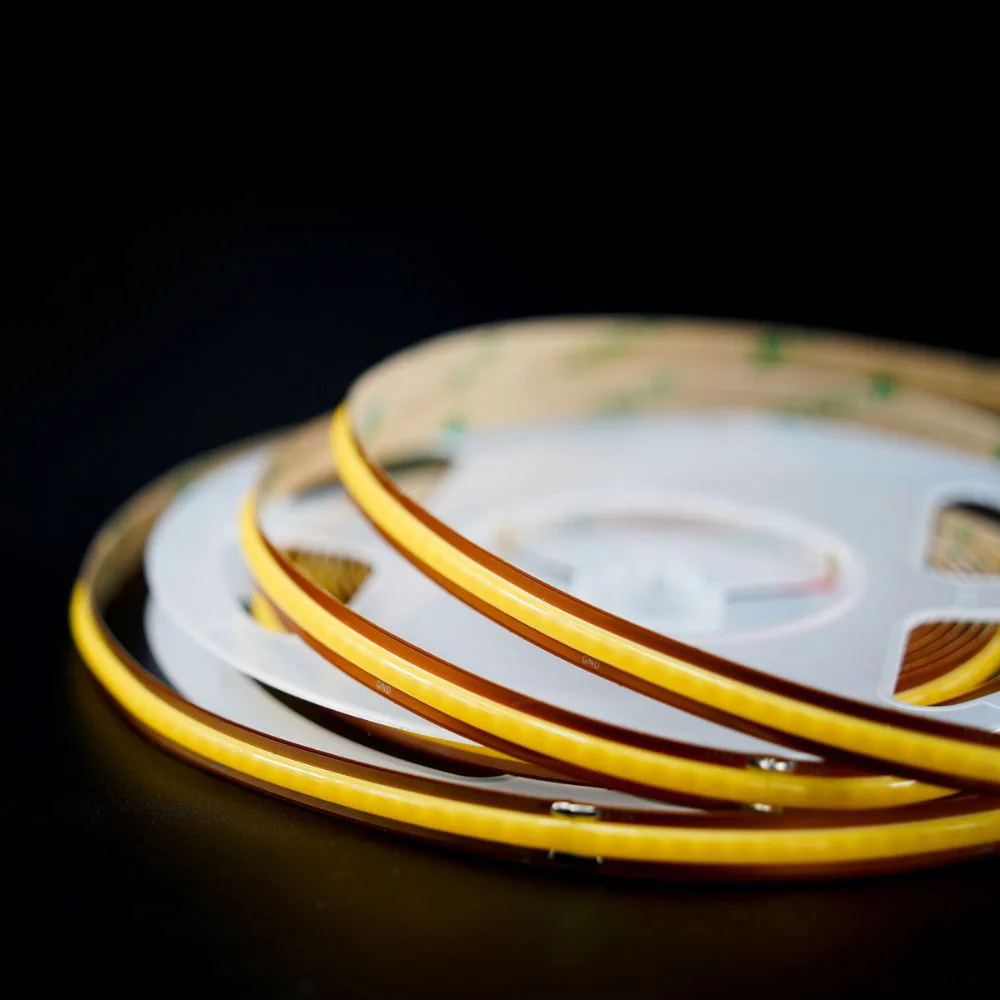
Free Cut High CRI Dotless COB LED Strip Light
Main Model: FYX08T480C free-cut
LED Chip QTY per Meter: 480chips
CRI: >90
PCB Width: 5mm/8mm
Color Temperature: 3000K/4000K/6000K
Input Voltage: DC12V/DC24V
Power per Meter: 6W/9W
Cuttable Length: arbitrary cropping
Waterproof Version: IP20/IP54/IP65/IP67/IP68
Warranty: 3 year
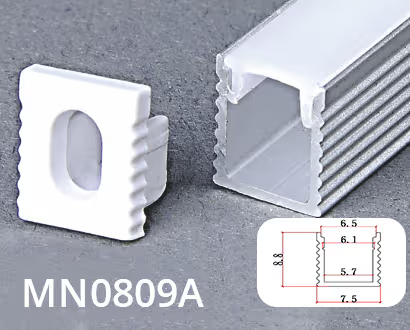
Thickness: 0.7mm
PC Color: Milk white
Size: L1000xW8xH9mm
End Caps/Clips: 1pair/m
Aluminiu Color: Silver/Black
MN0809A
$0.48-0.57/m
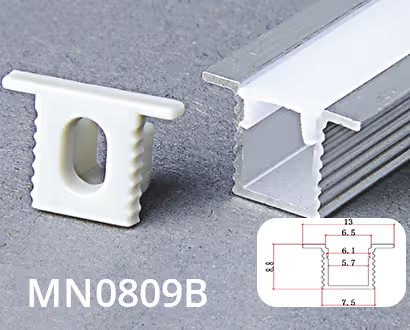
Thickness: 0.7mm
PC Color: Milk white
Size: L1000xW8xH9mm
End Caps/Clips: 1pair/m
Aluminiu Color: Silver/Black
MN0809B
$0.56-0.67/m
Attach the LED Strips to the Wall
- Apply double-sided adhesive tape to the back of the profile.
- Carefully press the profile along the planned path on the wood slat wall, ensuring it sticks firmly.
Connect Multiple Strips (If Needed)
- If you have multiple LED strip segments, connect them using connectors according to the manufacturer’s instructions.
- For a neat look, hide cables behind the wood slat wall or along its edges.
Connect to Power and Test
- Plug the power supply into a nearby outlet.
- Test your LED lights to ensure everything is working perfectly. Make any necessary adjustments for the best effect.
Enjoy Your Creation!
You’ve just transformed your wood slat wall into a stylish, illuminated feature! If you run into any issues or need further help, feel free to contact us. Happy DIYing!
Benefits of Installing LED Lights on Wood Slat Walls
Seamless Integration with Wood Panel Walls
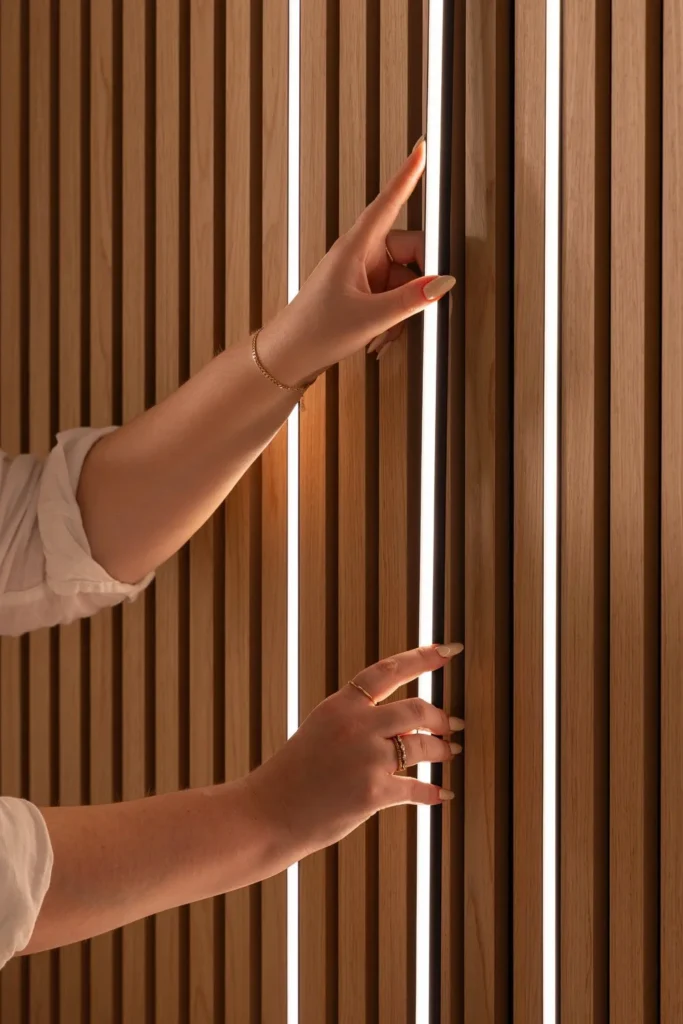
Wood panel is more commonly known as wood slat wall panels, and each slat is arranged with gaps between them that allow for the addition of LED lighting. All-in-one LED strips simply decide on the desired size and then recess or mount them between the slat gaps to create seamlessly integrated LED lighting that creates a cozy atmosphere in style.
Offering Endless Possibilities
LED lighting is versatile and offers endless possibilities for your space. You can adjust the lighting to suit the ambience of the room and your needs. For example, you can change the light intensity, control the color temperature, and even add dynamic effects. You can also install acoustic panels behind screens in your office and surround them with LED lights to create a stylish and focused workspace.
Integrate with Your Smart Home
Seamlessly integrated into your existing smart home ecosystem, our wood panel wall LED strips are compatible with Phillips HUE, Google Home, Apple HomePod, and Alexa, providing you with unparalleled convenience and control to transform your living space into a modern, connected environment. Whether you want to create a cozy night in or brighten up your workspace, the possibilities are endless.
Energy Efficient and Cost Effective
LED lighting is designed with energy efficiency and cost-effectiveness in mind. LED lighting technology consumes less power than traditional lighting solutions, helping you save money on your electric bill. In addition, the long lifespan of LED lighting ensures that you can enjoy the benefits for years to come without frequent replacements.
Tips for Choosing the Right LED Strips
When selecting an LED strip, focus on the following aspects:
LED Chips’ Quality and Parameters: Look for strips with a high CRI, low blue light emission, and a low SDCM value for better lighting quality and eye protection.
Circuit Board Quality: Opt for electroplated boards, as they provide better conductivity and durability.
Adhesive Backing Quality: Choose LED strips with genuine 3M adhesive for stronger and longer-lasting adhesion.
Resistor Quality: Generally, resistors are less important in selection as their differences are not as pronounced
Troubleshooting Common Issues
LED strip does not light up at all
-Confirm that your power supply’s voltage and current rating are compatible with your LED strip.
-Confirm that your power supply is working correctly.
-Check and isolate other accessories on the same circuit.
-Check for any visible loose connections
-Check for any visible signs of short circuits
-Check for invisible signs of short circuits
LED Strip is Dim at One End
-Check your Circuit Design, connecting too long of an LED strip will exceed the power rating for the LED strip sections connected closest to the power source.
-Check for Electrical Resistance, Excessive electrical resistance can be caused by poor electrical contact and corroded copper. Check your LED strip wiring and ensure all contacts are clean and sufficient.
-Diagnosing Voltage Drop, simply measure the voltage between the copper pads at various points along the LED strip. If the voltage progressively decreases as you move further away from the power source, this is a sign of voltage drop.
Creative Design Ideas
You can also choose different LED strip colors to decorate your slat wall panel!
The most common choice is white, which comes in:
- Cool White (6000-7000K) – Great for open spaces like living rooms and conference rooms.
- Natural White (4000-4500K) – Ideal for study rooms and offices.
- Warm White (2800-3500K) – Perfect for cozy areas like bedrooms and dining rooms.
Looking for something more colorful? Try RGB color-changing strips, smart IC RGB chasing effects, or even white waterfall chasing modes.
Plus, you can pair them with a smart controller to seamlessly connect with your other home devices.Light up your space your way!
Maintenance and Care Tips
One of the key advantages of LED light strips is their long lifespan, typically lasting over 50,000 hours. However, proper maintenance is required to ensure their longevity and optimal performance.
Regular Cleaning: Dust and dirt can accumulate on the surface of the LED strips, especially if they are exposed to the environment. Gently wipe the strips with a soft, dry cloth to maintain their brightness and clarity.
Check for Damage: Periodically check the LED strips for signs of wear or damage, such as dimming or flickering. Replace any faulty sections promptly to avoid affecting the overall lighting quality.
Replace Power Supply: The power supply may also need to be replaced over time, especially if it becomes faulty. Ensure that the replacement power supply matches the specifications of the original.

