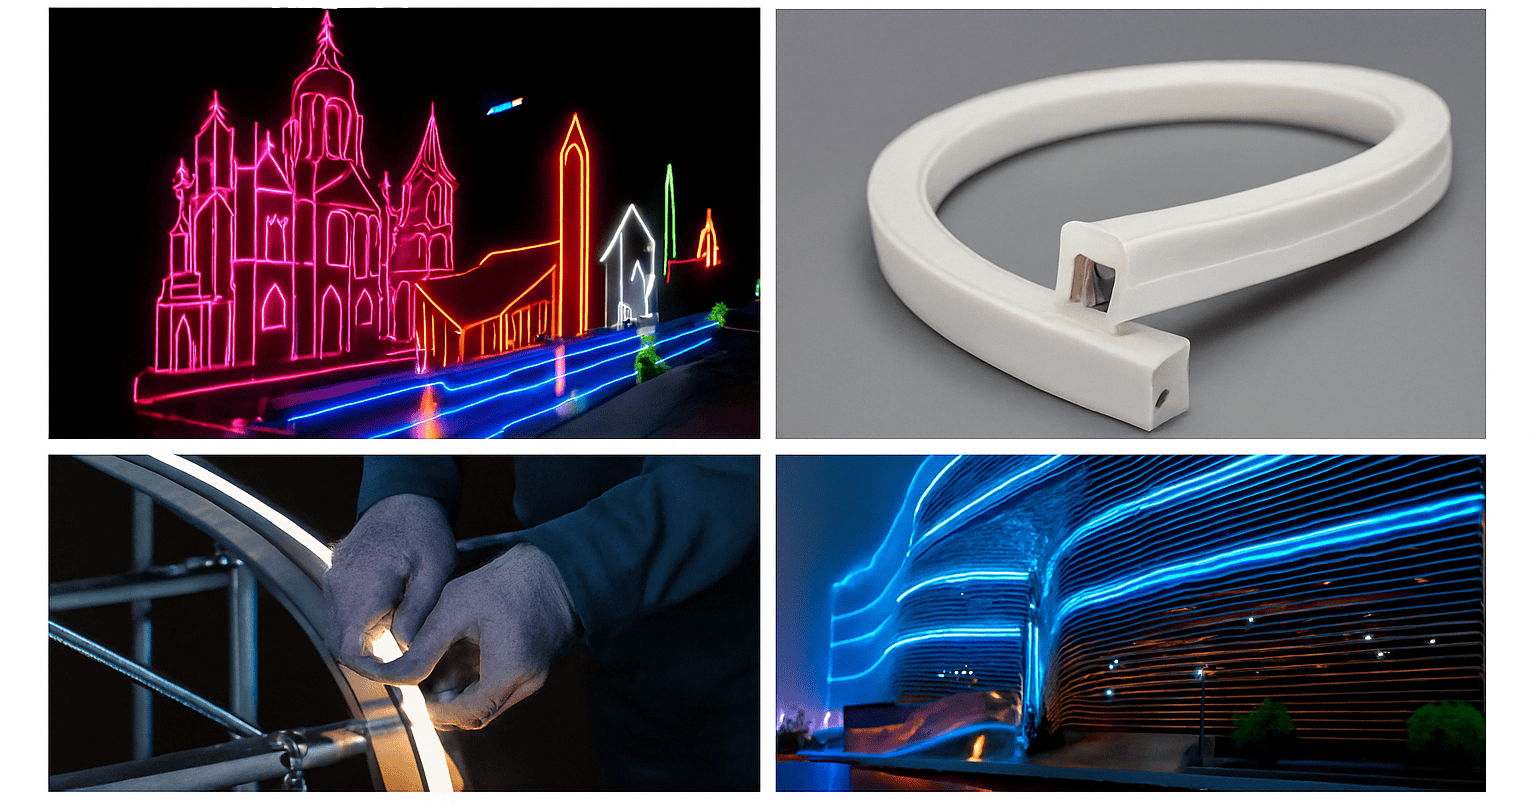
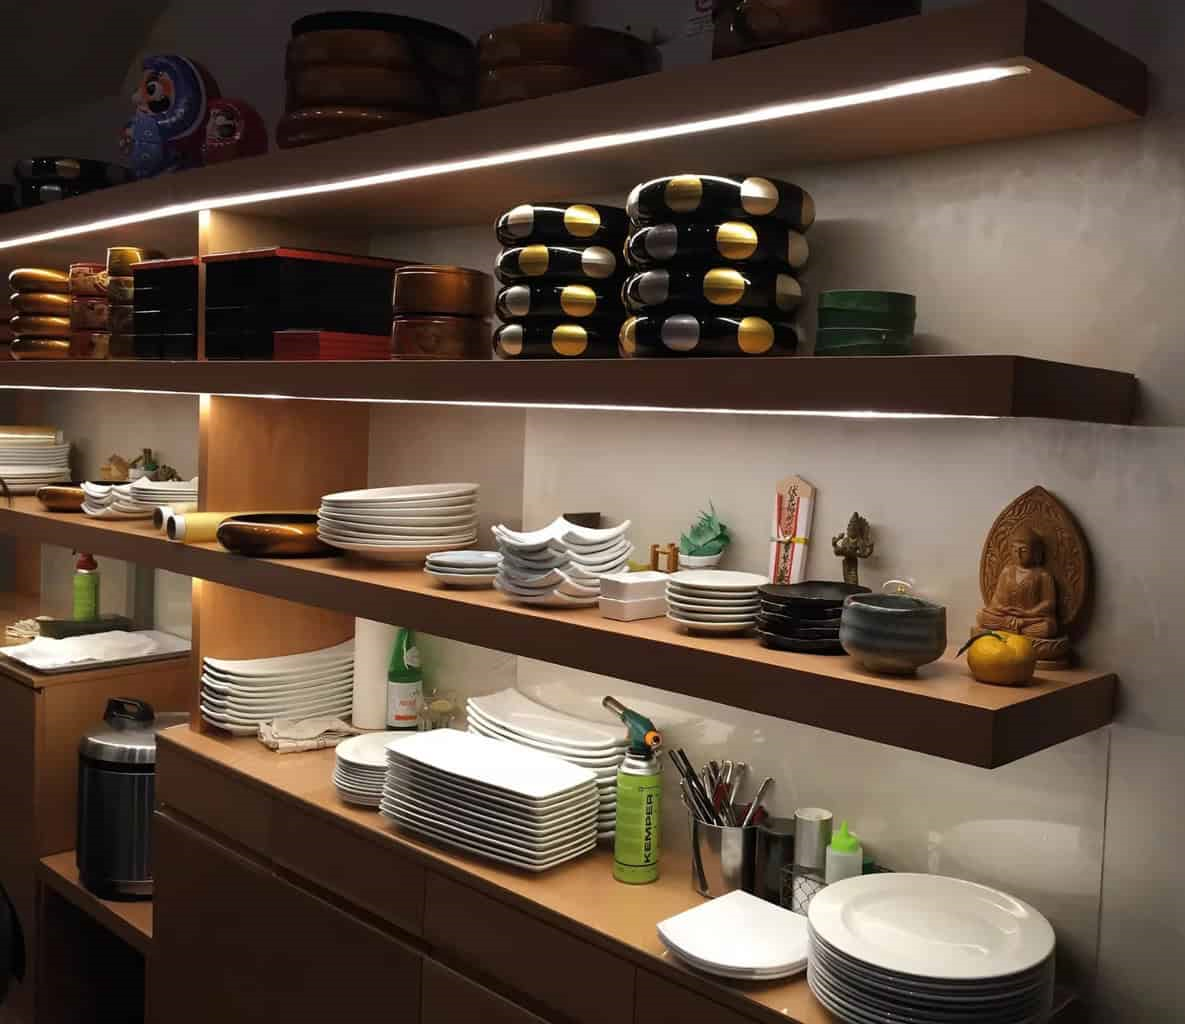
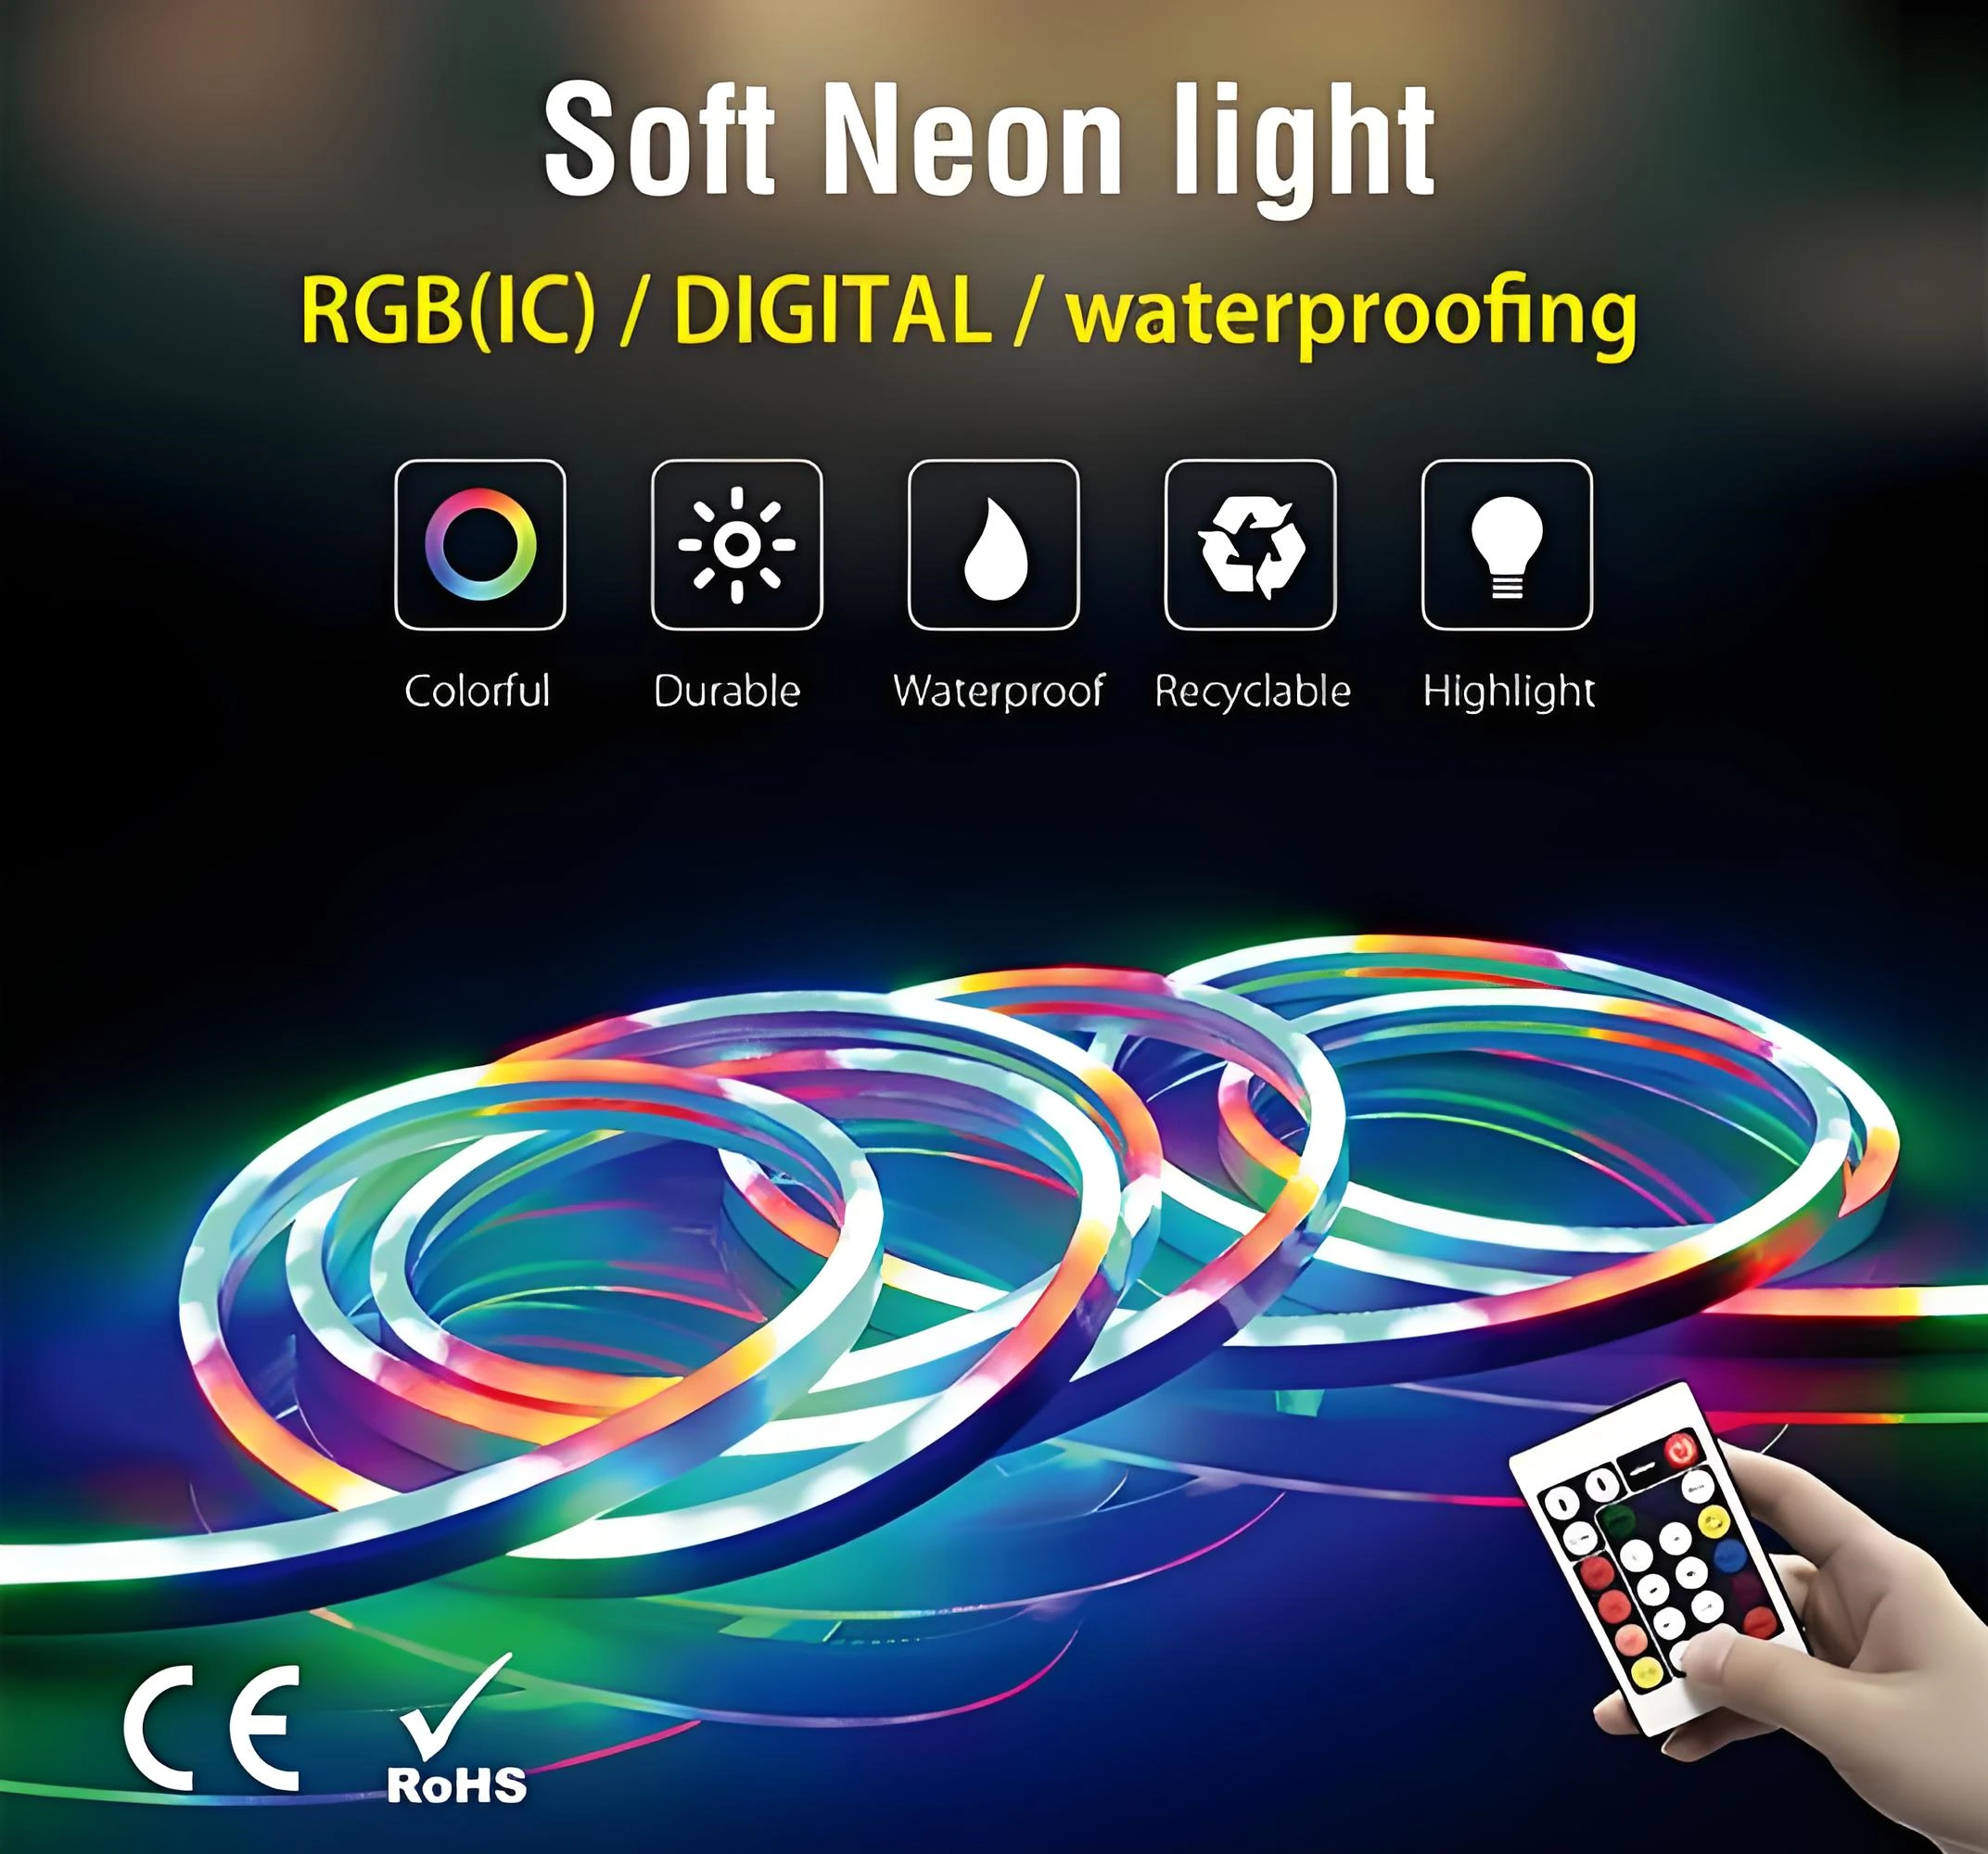
In the vast field of LED lighting solutions, LED strip lights are a very popular lighting solution. Linear LED strip lighting has been an affordable option for commercial and residential lighting applications.
LED strips, essentially a string of LEDs mounted on a flexible or rigid strip via surface mount technology, are popular for their ability to bring vivid, dynamic lighting to any environment. Given their varying functions and characteristics, understanding the different types of LED strips is essential to determining the best LED strip for your project.
However, there are many things to consider, such as which strip is best for your application, what the correct power source is or how to install and connect them, and how to control the LED strip. If you’re struggling with any of these questions, then you’ve come to the right place! Our complete guide to LED light strips will help you with any light strip-related questions you may have.
What is an LED Strip Light?
Essentially, LED strips are flexible circuit boards where the LEDs are arranged in a linear fashion, often with tape on the back of the board for ease of installation. So, you may often hear these lights referred to as flexible LED strip lights, LED tape lights, or LED strip lights.
LED tape comes in a variety of different chip types, widths, lengths, and outputs. Depending on the type of strip you have, you can change the color, CCT, brightness, or mode and many more features when paired with a compatible controller or dimmer. Overall, LED strip is a new and versatile form of lighting.
But no matter how many variants of LED strips there are, most of them have the following characteristics:
1. Consisting of a number of individual LED emitters mounted on a narrow flexible circuit board
2. Using low-voltage DC power supply (DC5V ~ 24V) operation
3. Available in a variety of monochrome or variable colors and brightnesses
4. Packaged on long rolls, typically 5 meters per roll.
5. Can be cut to length with double-sided tape for installation.
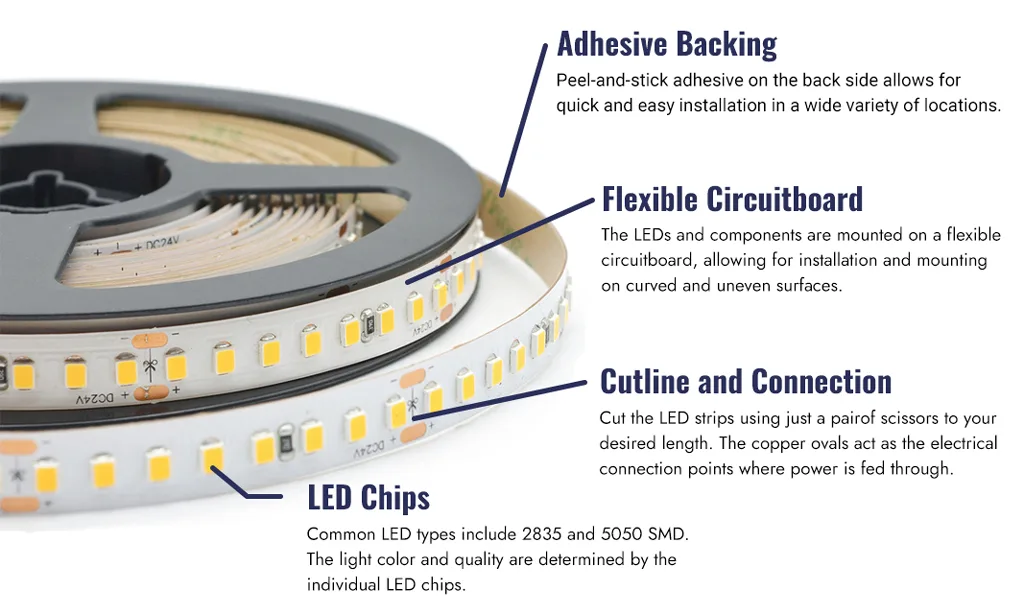
LED strip lights are easy to install and configure and are commonly used for ambient, task, decorative, or artistic lighting and more. One of the best things about these LED light strips is that they can be cut to meet your specified length or shape, which means they can be installed almost anywhere and can be customized for any project.
Types of LED Strip Lights
LED Strip Lights is a broad category that includes all different types of LED Strip Lights. Each type of LED strip light has its own special features and advantages. However, when it comes to the basic types, there are only two, and the rest of the categories are based on them. These two basic types are what we often refer to as SMD LED strip lights and COB LED strip lights.
SMD LED Strip Light
SMD (Surface Mount Device) LED Strip is an earlier popular type of strip. In SMD LED strips, a series of chips are mounted and soldered to a flexible circuit board, with relatively consistent space between each LED.The LED chip types are specified by their size (in millimeters), most commonly 2835, 3528, and 5050.SMD LED strips are bendable, versatile, and customizable, and they can also be cut or soldered together to achieve the exact length.

COB LED Strips
COB LED strips are chip-on-board LED strips, sometimes referred to as dotless or spotless LED strips, and are one of the newest developments in the LED field. In COB strips, individual LED chips are tightly packed together and covered with a phosphor diffuser on top to produce a uniform, continuous glow.COB LED strips are also flexible, allowing them to be used in round or sharp application areas. Like SMD LED strips, COB LED strips can be cut or soldered together at designated marks.

COB LED strips work best when they reduce or eliminate hot spots or light spots near highly reflective surfaces. COB strips are especially useful when you can’t hide the LED strip behind anything and you don’t want the individual LED chips to be conspicuous.

Ultimately, LED strips have resulted in many types of LED strips based on these two basic types of LED strips going into development. Below we’ll cover some of the elements of each type of LED strip and more variations, and then we’ll dive into more technical details to help you make an informed buying decision.
Monochrome LED Strip Lights
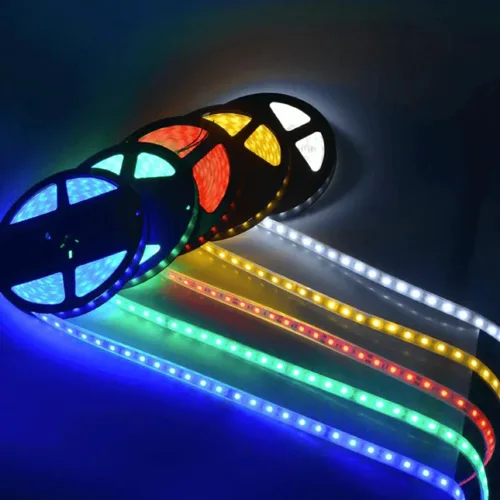
Monochrome LED strips are a simple and versatile lighting solution that emits a consistent and uniform color. Available in standard shades of white, red, green, or blue, each color has a unique purpose.
Tunable White CCT LED Strip
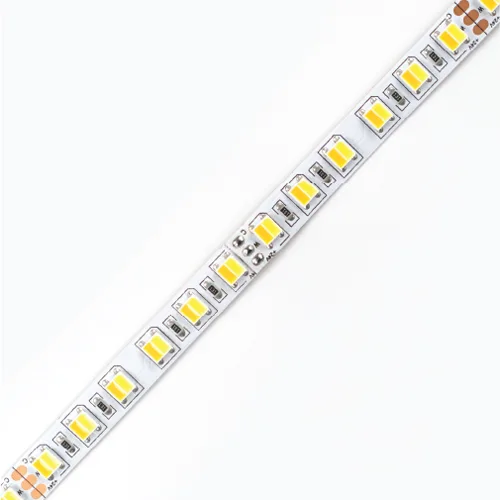
Tunable white LED strips increase color variability by changing the Correlated Color Temperature (CCT) with the help of a remote control or compatible application. Adjust the different CCTs for colors ranging from warm 2700K to cool 6500K.
Color-Changing LED Strip
Color-changing LED strips integrate red, green, and blue, or with additional white LED chips, for a variety of shades that can be used to change the lighting color at any time. These strips are available in a variety of options: RGB, RGB+W, or RGB + tunable white.

Addressable LED Strips
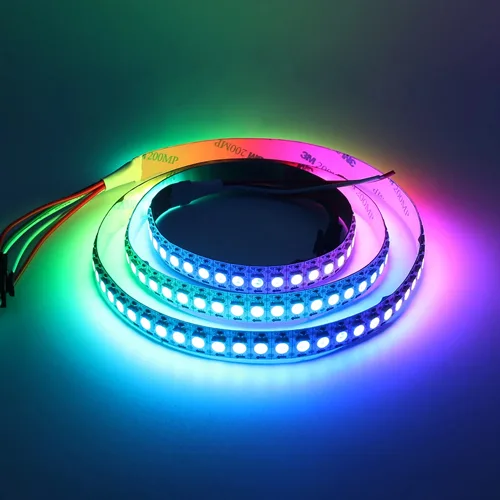
Addressable LED Strips (also known as Digital LED Strips) allow each LED or group of LEDs on the strip to be controlled individually via IC, revolutionizing customizable lighting. It allows the creation of complex patterns, fades, and effects, turning LED strips into dynamic canvases of light. Also features multiple patterns, sequence lengths, and chase speeds, perfect for light shows.
Outdoor LED Strip Lights
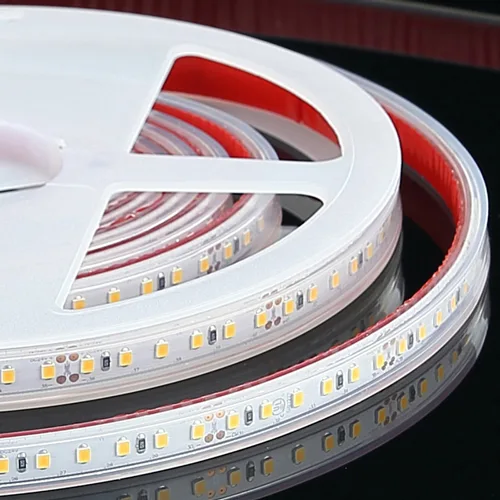
Outdoor LED Strip Lights are rated IP65 and above. These waterproof LED strips are suitable for use in wet areas such as restrooms, pool areas, or outdoor lighting. The waterproof cover usually protects the LEDs from moisture and other external conditions.

High Voltage LED Strips
High Voltage LED Strips (also known as AC Plug & Play LED Strips) are diode rectifiers that are placed on a printed circuit board and do not require a power supply to drive them at all, so they are sometimes referred to as driverless AC LED strips.
Multi-Row LED Strips
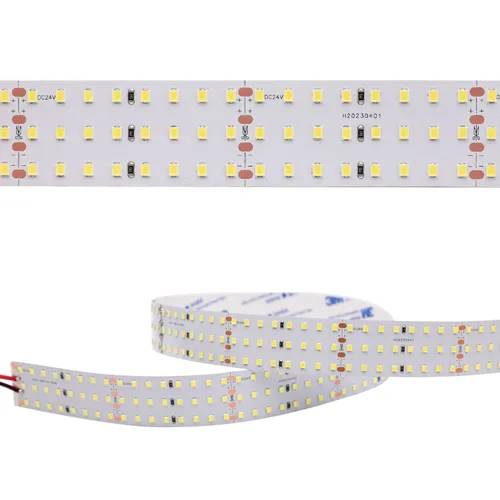
Multi-row LED strips are LED strips with more than 2 rows of LED chips mounted on a single circuit board. These are great if you want a wider light source with all the flexibility of a strip.
Side-illuminated LED Strips
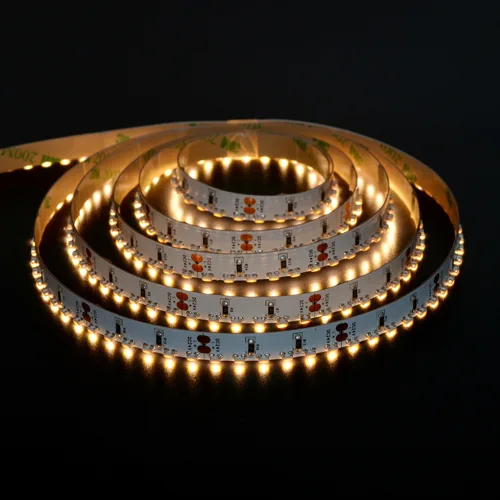
Unlike LED strips that emit light in an upward direction, side-illuminated LED strips emit light to one side from vertically mounted chips. Side-illuminated LED strips are designed to be mounted on a flat surface without exposing the strip.
What do Letters or Numbers in the LED Strip Light Mean?
When you are buying or looking for LED Strip Light, you may come across various combinations of letters and numbers, such as SMD5050 RGB LED Strip Light, which are used to describe the type of LED Strip Light you are looking at. So what do these letters and numbers mean?
The letters in the description refer to the output color of the LED chips on the strip. If the letters are separated by a “+” or a space, it generally means that they are separate chips, and if there is no space, it generally means that they are integrated into one chip. For example, RGB+W LED strips and RGBW LED strips. When LED chips are integrated on separate LED beads, more LED beads can be packed into the same length of strip. Let’s take a look at what the common letters and letter combinations stand for in the description of LED strip lights:
RGB: Red, green, blue. RGB LEDs contain three colors on the same chip, each connected to its own channel. By adjusting the power transmitted to each color (using a controller), any combination of colors can be created.
W: White. Typically, a single “W” stands for pure white, with a color temperature of typically 6000-6500 K. However, there is no set standard, so be sure to double-check.
WW: Warm White. Warm white is usually 2700-3000K, similar to the color of an incandescent lamp.
NW: Neutral White. Also called natural white, color temperature is usually 4000-4300K.
CW: Cool White. Cool white is in the range of 6500K-10000K, but please check to make sure it is correct.
CCT: Correlated Color Temperature/Color-Changing Adjustable. CCT usually stands for Correlated Color Temperature, which is often found on the properties or labels of LED strips, such as CCT: 6500 K. Another meaning of CCT is Color Changing Adjustable; CCT usually means that the strip contains two channels of white. One is warm white and the other is cool white. By adjusting the power delivered to each white channel, the strip can produce any white light equal to or between the two LEDs.
LED strip descriptions usually include a 4-digit number, such as 5050 or 2835, which usually describes the chip size. For example, a 5050 LED chip measures 5.0 millimeters wide by 5.0 millimeters high. Similarly, a 2835 chip measures 2.8 mm in width and 3.5 mm in height. If you want to know more about LED chip types, please read the post Difference between SMD LED and COB LED: Which is better?
But if you’re looking at digitally addressable LED strips, you may see another combination of letters and numbers, such as WS2812B or SK6812, but in this case it has nothing to do with chip size. Instead, the number is the name of the integrated LED control chip. For more chip types and information on Addressable LED Strip, read the post Complete Guide to Addressable LED Strip IC Types.
Understanding the Characteristics of LED Strip Lights
By understanding the characteristics of LED Strip Lights, you will be able to make informed decisions and easily select the best LED Strip Lights for your project, creating the ideal ambiance and lighting effect in your area.
Length
LED strips are usually supplied in fixed lengths such as 5m/reel, 10m/reel, or 20m/reel, but many styles are available in customized lengths. First, you start by determining the total length of the required light strip. Then, you must determine the maximum run length of the LED strip.
The maximum run length is the maximum length that the strip can extend from a single power supply without excessive voltage drop. Voltage drop occurs when the circuit is so long that the voltage at the end furthest from the power supply is insufficient to push enough power into the strip. The result is that the LEDs at the end of the strip are dimmer than the LEDs at the beginning of the strip.
Many factors affect the maximum run length of an LED strip. If your strip has a high optical density, such as a COB strip, the maximum run length will be lower because there are more components causing the voltage drop. On the other hand, a strip with a higher voltage (e.g., 24V) will have a longer maximum run length because the current consumption is lower. To learn more about the causes and solutions of voltage drop, read the post: Voltage Drop on LED Strips: Causes and Solutions.
Density
The density of an LED strip is the number of LEDs per unit length. Depending on how continuous you want your light to look, choose from low, standard (medium), or high-density LED strips. High-density LED strips have more LEDs per meter, and low-density strips have fewer LEDs per meter. Because low-density strips have more space between each LED, they emit less light but require less power to operate. COB LED strips have the highest density of all strip types.
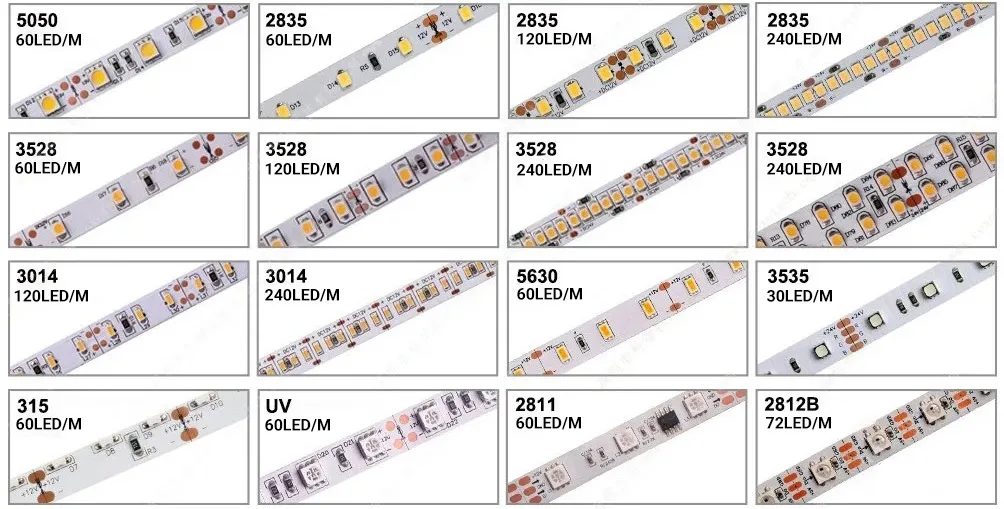
LED density is important in determining the distance (spacing) between LEDs and the presence of visible hot and dark spots between LED beads. Higher densities of 120 LEDs per meter generally provide the best, most evenly distributed lighting. LED beads are the most expensive component in LED strip manufacturing, so it is important to consider LED density differences when comparing LED strip prices.
Brightness
The brightness of an LED strip is measured in lumens. Brightness depends on two main factors: chip density and power consumption. A strip with a higher LED chip density will be brighter than a lower density strip consuming the same amount of power. However, if a low-density strip uses more watts per foot, it may be similar in brightness to a high-density strip. For this reason, you should look for lumens/meter rather than total lumens.
Depending on how you use your LED strip, you may need a certain level of lumens. For accent lighting, you may not need more than 200 lumens per foot, but there are no exact rules here; it all depends on personal preference and how you want to feel/mood. Here are some guidelines for choosing a brightness level based on the situation:
| Application | Suggested Lumen/Foot |
| Accent/Mood lighting | 150-350 |
| Under cabinet lighting | 175-525 |
| Task lighting (close) | 275-450 |
| Task lighting (far) | 350-700 |
| Indirect lighting | 375-575 |
| Fluorescent tube replacement | 500-950 |
Colors
LED light strips come in a variety of single- and multi-colored strips (RGB or RGBW). Generally speaking, white is the most useful and popular choice for indoor lighting applications.
Single-color LED strips that emit only one fixed color of light. We offer the following colors: Warm White, Neutral White, Cool White, Red, Green, Blue, Yellow, Pink, and Ultraviolet (UV).
Multi-color LED strips are also known as color-changing LED strips, and they can change colors to your liking. These strips typically have red, green, and blue (RGB) LED chips that can be mixed to create unique effects. For added adaptability, some color-changing LED strips are also available with white LED chips.
Color Temperature and CRI
Color temperature is how we distinguish between the various shades of white that LEDs can emit and is a measure of how “warm” or “cool” a light’s color is. The temperature is measured in Kelvins, with higher temperatures representing cooler colors (6500K, a bluish tint) and lower temperatures representing warmer colors (2700K, a yellowish light emitted by a light bulb). For more information on color temperature comparisons, read the post: 3000K vs 4000K vs 5000K vs 6000K: What’s The Difference?
CRI (Color Rendering Index) indicates how accurately an artificial light source reproduces the true color of an object compared to natural daylight. The closer the CRI of a light source is to 100, the better the color rendering. With low CRI LED strips, colors may appear distorted, faded, or difficult to discern. High CRI LED products provide light that makes objects appear as they would under an ideal light source, such as halogen or natural daylight. Also look at the R9 value of the light source, which provides more information about how the color red is rendered.
Power
Another key factor in LED strip lighting is knowing the wattage.LED strip wattage is the amount of electricity consumed per unit length of the LED strip, which varies depending on the density, color temperature, and brightness of the LED chips.
Wattage tells us how much power the LED strip lighting system will consume, so this is important for determining your electric bill and power requirements. A quality LED strip should be able to deliver 10 watts or more per meter (15 watts/meter). When selecting LED strip lighting based on wattage, be sure to consider the power requirements of the installation and the intended use of the lighting.
Voltage
The voltage of the LED strip depends on your specific application and installation location. The most common voltages for LED strips are 5V DC, 12V DC, 24V DC, 36V DC, and 48V DC. 12V DC strips are the most popular. The higher voltage strips usually have a longer maximum run length. Whichever voltage you choose, you will need a power supply that matches the voltage of the strip.
For a typical strip, most people will choose either DC12V or DC24V. Typically, DC12V is great for small installations, but for larger installations, DC24V is preferred, but for projects with digital LED strips, it can sometimes be convenient to use DC5V strips. Most digital controllers run on DC5V, which allows the controller and the strip to run off the same power source. In addition, on a 5V strip, each LED can be controlled independently.
How to Determine the Quality of LED Strip Lights?
Sometimes it can be tricky to differentiate between good and bad quality LED strip lights. Here are some tips to help you know where to start.
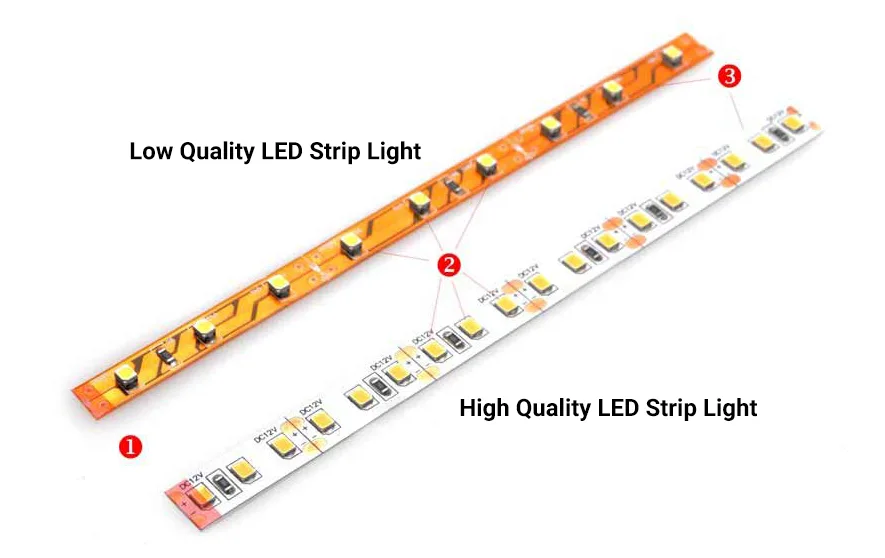
- Board Composition and Quality: For higher-power LED strips, the quality and specification of the underlying board are critical. Because of the high current that must pass through each section, copper material of sufficient thickness is required. Look for LED strips with a copper thickness of at least 2 ounces (preferably 4 ounces) to ensure that the board can handle the higher power. Otherwise, these LED strips may experience voltage drops.
- LED Quantity and Quality: The efficiency, quality, and stability of light output are directly determined by the LEDs. Look for LED strips with strict quality control and specifications for the LEDs, and watch out for LED strips that claim high power but have low LED counts, as this may indicate that the LEDs are being driven at full capacity, leading to premature failure.
- LED Strip Surface: High-quality LED strips are often coated with an additional layer of insulating white paint to help improve light reflectivity and increase overall light output. Low-cost LED strips will skip this step and leave the copper color exposed. This can affect the brightness and color of the light, especially in LED aluminum channel installations.
How to Install LED Strip Lights?

Installing LED strip lights is a lot easier than you might think. Here are the installation instructions:
1. Prepare all the necessary components: LED strip lights, a power supply (usually an LED driver or transformer), a tape measure, a microfiber cloth, scissors, and some LED strip light connectors (if you need to connect multiple strips).
2. Measurement and planning: Before installing LED strips, measure the length of the installation area to determine how many LED strips are needed. Plan the layout ahead of time, taking into account any turns or bends that will be needed.
3. Clean Surfaces: Make sure the surface to be installed is clean and dry. You will need good adhesion so that the strip can be secured in the mounting position. So, before installation, you need to clean the surface with a clean microfiber cloth and warm, soapy water.
4. Peel and Stick: LED strips usually come with an adhesive backing. Peel off the protective cover and carefully stick the strip to the location you want to install it. Be sure to be precise, as it may be difficult to reposition them once they are attached.
5. Use scissors to cut off the excess strip: Most LED strips have marked cut points; you will need to use scissors to trim at the cut points to avoid damaging the strip.
6. Connect the LED strip and driver: If you are using multiple LED strips, use the LED strip connector to connect them together. Then, connect the strip to the LED driver.
7. Power up and test: Connect the LED driver to an electrical outlet and turn on the lights to test if the installation was successful. If the process goes well, the strip will light up properly. You can also add an LED dimmer or remote control for added convenience.
Although the LED strip is versatile and easy to install, it is still an exposed circuit board assembly. Mounting LED strips in LED aluminum channels with diffuser covers can dramatically improve the aesthetics of your lighting fixtures. LED strip aluminum channels are typically available in U and V shapes with either diffuser covers or clear covers. They come in different widths, so make sure the channel fits the LED strip.
Benefits of installing LED strip lights in LED aluminum channels:
- Provides an even surface for the LED strip adhesive to form a strong, long-lasting bond.
- The aluminum channel acts as a heat sink to help dissipate heat, thereby extending the life of the LED strip.
- The cream-colored plastic cover diffuses light. This way the light emitted by the LEDs will look more even.
- The cover also helps protect the strip from dust and damage.
How to Connect LED Strip Lights?
There are two ways to connect LED strips: soldering or using LED strip connectors. Which one is better for you? You can choose according to their advantages and disadvantages.
Soldering

Soldering is a more stable method than using LED strip connectors. The performance of the LED strip is almost the same before and after soldering, and the operation of the LED strip is hardly affected. However, it requires you to have soldering tools and some soldering skills. With these, you can get a more permanent and durable connection than with ribbon connectors. Here is the procedure for this method:
Step 1: Keep your soldering iron tip clean. Rubbing the tip of the soldering iron on a sponge soaked in water will not only cool it down temporarily but also remove any excess tin from the tip of the soldering iron, being careful not to burn your hands.
Step 2: Hold the wire in your left hand and the soldering iron in your right hand. Remember to wear gloves when soldering. Do not inhale odors that are harmful to your health.
Step 3: Gently touch the tinned part of the wire to the soldering point of the LED strip. Tap gently with the soldering iron and be careful that the tip of the iron touches both objects at the same time.
Step 4: Leave it for a few seconds and then leave it at a 45° angle.
Step 5: After sticking firmly, connect the power and see if the strip can light up.
Using LED Strip Connectors

There are several types of LED strip connectors. To connect LED strips, you need LED strip connectors. Here’s how to effectively use the connectors to connect LED strips:
Step 1: Selecting the Right LED Strip Connector
First, determine the type of LED strip you are using, as this determines the connector’s pinout. For example, a single-color LED strip requires a 2-pin connector, while an RGB LED strip requires a 4-pin connector. Also consider the width of the LED strip to ensure that the connector fits correctly. If your LED strip is waterproof, select an IP67 or IP68-rated connector to maintain a watertight seal. For more information on how to choose the right LED strip light connector, please read the post How to Choose the Right LED Strip Connector.
Step 2: Prepare and Connect the LED Strip
LED strips usually come with an adhesive backing for ease of use. First remove the tape from the ends of the strip to be connected. Attach the connector to one end of the LED strip and then attach it to the other strip. During this process, make sure that the positive and negative markings on the LED strip are aligned with the markings on the connector to avoid any electrical mismatch.
Step 3: Protecting the Connection
After connecting the LED strip, snap the supplied plastic cover over the connector to secure the fitting. This cover helps protect and seal the connection. Press firmly on the cover to ensure it seals tightly. You are now ready to install the extended LED strip setup in the selected location.
If you want to know more about connecting LED strip lights, read the post Can You Connect Multiple LED Strip Lights?
How to Control LED Strip Lights?
The method of controlling LED strip lights depends on the type of strip (single color, RGB, RGBW, programmable pixel strip, etc.), the power supply (DC, AC, USB, etc.), and the control requirements (manual, smart, etc.).
How to Control Single Color LED Strip Lights
Single-color LED strips simply need to be powered on to light up, and a controller is not necessary. You can connect it directly to the power supply and then use a wall switch or power plug switch to directly control the strip on and off. You can also connect the strip to a Wi-Fi- or Bluetooth-enabled smart outlet and use a mobile app or voice assistant to control the strip on and off. The functionality is basic but sufficient for simple needs.
While changing the color isn’t your concern, most people still want to be able to at least adjust the brightness. That’s where a dimmer controller becomes indispensable.
There are two common ways to intelligently control the brightness of monochrome LED strips.
The first way is through a smart AC dimmer mounted on the wall.
The procedure is to connect the wiring of the dimmer switch to the power supply and then lead from the power supply to the strip. The disadvantage of this method is that a dimmable power supply must be used, which is usually more expensive. The advantage is that any standard dimmer can be used, including smart dimmers. One advantage of this approach that is easy to overlook is that when you turn off the LED strip, the power supply is also turned off, which avoids the extra power consumption caused by an unloaded power supply.
The second way is to use a smart controller.
The wiring sequence is from the power supply to the controller and then to the strip. The advantage of this method is that the smart controller can control multi-color strips and does not require a dimmable power supply. The disadvantage is that the strip is not directly connected to the wall controller; if you want to control it on the wall, you need to install additional smart switches in the appropriate location to communicate with the LED controller.
And it is also worth noting that this control method will make the LED power supply always on when you do not light up the strip, resulting in the power supply being in the no-load operation state and consuming a certain amount of power. Although the power consumption is not a lot (only between 0.5W and 2W), long-term no-load operation may affect the service life of the power supply.
How to Control Multi-color LED Strip Lights
If your LED strip supports color changing, then you will need a smart LED controller. Make sure the LED controller has enough channels.
Tunable white LED strips have two sets of LEDs: one warm white and one cool white. They require a dual-channel CCT controller to manage the color temperature, allowing you to customize the white light to your liking. This controller comes with 3 output terminals: one terminal connects to the positive terminal (V+) of the strip, the remaining two correspond to CW- (6500K) and WW- (2700K), and finally, the CCT controller is connected to the LED power supply.
The problem to be noted is that the LED power supply has an important standard, that is, 80% of this regulation, the power consumption of the double white LED strip can not exceed 80% of the power supply; the LED controller is the same. So the power supply and LED controller have the same power. If your LED strip light needs 96W, then you need to prepare an LED power supply of at least 115.2W and a 115.2W LED CCT controller.
If you are using RGBW LED strips, you will need an RGBW controller with 5 output terminals. One terminal is for the strip voltage (V+) and the remaining four correspond to the R-, G-, B-, and W- channels. As for the RGB LED strip, the connection and control are the same as for the RGBW strip. Since it only has one less W-channel, you only need to buy one RGB controller.

It is possible to use LED controllers with more channels, but be aware that each channel has a limited current-carrying capacity because the controller has a limit on the current flowing through it. For example, this CTL-RGBW-PC-TMB08 controller can handle up to 4 amps of current per channel. Often, a voltage drop will cause problems before the controller runs out of capacity.
How to Choose an LED Controller
Smart LED controllers communicate with your smart home system through a wireless “language” (protocol). There are four main protocols to choose from: RF, WiFi, Zigbee, or Z-Wave.
RF controllers are automatically synchronized with each other within 30 meters, and the signal is output from the RF remote controller, which is received by the controller within the effective distance and automatically synchronized to the next controller, thus achieving long-distance control of the strip. RF controllers can be controlled by a smartphone with WiFi-Relay, which is probably the most economical choice.
If you don’t have other smart home devices, we recommend the WiFi LED controller. It doesn’t require an additional hub (it uses your WiFi router directly) and is usually more economical than other options.
Zigbee and Z-Wave are both wireless protocols designed for home automation. With these controllers, you can connect your controllers to smart hubs like Samsung SmartThings for endless automation possibilities.
For more information about the selection of LED controllers, please read the post How to Choose LED Controller for LED Strip?
How to Control Individually Addressable LED Strips
With analog LED strips, all LEDs of the same color are connected to a single channel. A single LED controller can regulate the power of each channel, but it cannot control each LED individually.

The control of an addressable LED strip is very different from analog control. The IC chip on an addressable strip receives digital signal data from the LED controller and sends control commands to each LED. One IC can control one or more LEDs, and different control commands can be sent to each IC so that adjacent ICs can control areas of LEDs with different colors and brightness levels, allowing for complex lighting effects.
To control an addressable LED strip, you need several key components as follows:
- To use digital control, you first need a digital addressable LED strip.
- Of course, an LED controller is also necessary. Controllers are categorized as SPI controllers and DMX512 controllers.
- In addition, you’ll need a computer (many people use an Arduino, LedEdit, or Raspberry Pi) to process the code and send the signals to the SPI or DMX controllers, which in turn send the signals to the microprocessor on the LED strip.
- Finally, you will need to provide the computer with a program that instructs the microcontroller how to operate the lights.
Once you have the ability to control each LED independently, you can create more complex effects. You can control LED strips by adjusting the color, brightness, and pattern to create environments that reflect your mood, enhance your décor, or simply bring your imaginative concepts to life.
For more information on controlling and programming addressable LED strips, read the post: Ultimate Guide to Programmable LED Strips.
Conclusion
That’s our introduction to LED light strips. Buying LED strips doesn’t have to be a difficult process as long as you know what to look for. The key when purchasing LED strips is to make sure you understand your application and area constraints and then understand your installation, power needs, and color options. With our range of LED strips and options, you’ll find everything you need for your lighting project.
In short, there are a wide variety of LED light strips on the market, each catering to different needs and ideas. From simple, single-color strips to complex, addressable strips, the possibilities are vast. Consider your specific needs and preferences carefully when choosing the right LED strip for your project. If you have any questions and need help, please feel free to contact us.
